




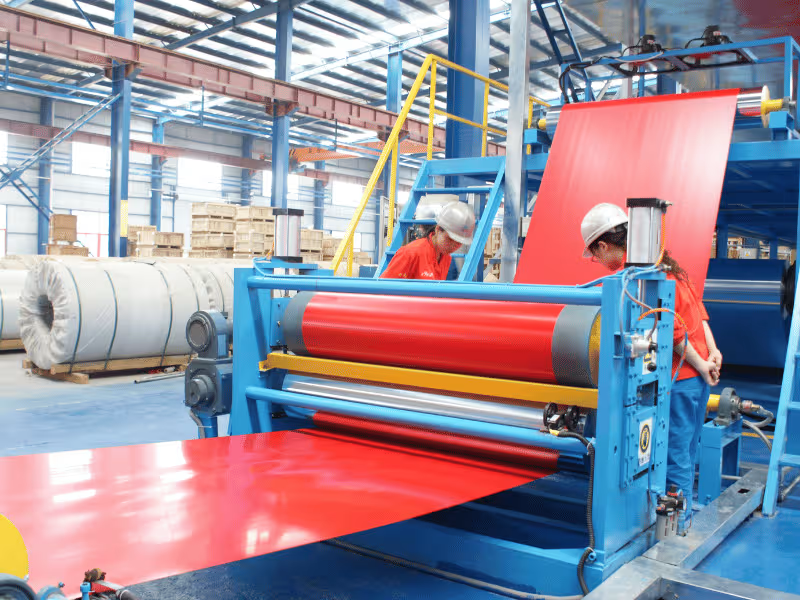
The coil arrives on time, and the paint looks perfect. Then the problems start. The strip runs 20 mm too wide for your roll former. Sheets that looked flat on the pallet spring back unevenly on the press brake. Or the customer’s design calls for a stucco texture, and you’re holding a smooth master coil.
I see these problems again and again, and most of them start before the coil ever reaches your plant. A master coil rarely arrives ready to run. Three coated coil processing services close most of the gaps:
- Slitting changes the width.
- Cut-to-length (CTL) turns coil into flat sheets or blanks.
- Embossing adds texture and stiffness.
Each process can also damage the coating if the processor handles it poorly. One scratch line or one wavy sheet can turn good material into scrap.
This guide shows you when each process makes sense, how to protect the coated surface, and which specs to send before you place an order. Clear specs up front help you avoid rework, delays, and rejected parts.
Why Processing Decides Whether a Coated Coil Order Succeeds
Coated coil processing turns a master coil into the exact width, length, flatness, or texture your next operation needs. The goal sounds simple: make the material fit the line it feeds.
The material makes that goal harder. Most coils I handle fall into four groups: prepainted steel, galvanized steel, aluminum, and stainless steel. Each carries a finish the buyer already paid for, and each behaves a little differently on the line.
Coated Coil Gives You No Second Chance
On bare steel, a light scuff often disappears under a later paint job. A coated coil arrives with its final finish already in place. Every roll, guide, and knife touches the surface your customer will see.
Here’s what I watch most closely:
- Surface protection. One dirty roll can drag a scratch line across hundreds of meters of strip.
- Coating, film, and texture. Paint, protective film, and embossed patterns must survive tension, contact, and stacking.
- Appearance consistency. Small gloss shifts or waves stay hidden on a flat coil. They show up fast once you bend a garage door panel and place it next to its neighbor.
Processing Controls Fit, Saleability, and Scrap
Many buyers treat processing as a small extra on the quote. In practice, it controls three outcomes:
- Fit: Does the coil or sheet run smoothly on the next machine?
- Saleability: Does the surface still look good enough for the end customer?
- Scrap: Does your yield hold steady, or does it slip with every rejected batch?
Good processing protects the value already built into the coil. Poor processing quietly eats it.
Slitting, CTL, and Embossing at a Glance
When a buyer calls me about a coil that won’t run, I start with one question: What does the next machine need to receive? The answer almost always points to one of three services.
|
Service |
What It Does |
Best For |
Main Buyer Concern |
|---|---|---|---|
|
Slitting |
Cuts a wide master coil into narrower strips that stay in coil form |
Roll forming lines, tube mills, coil-fed presses |
Width tolerance, burr, and clean edges without coating damage |
|
Cut-to-Length |
Uncoils, levels, and shears coil into flat sheets or blanks |
Stamping, press brakes, architectural and appliance panels |
Flatness, length accuracy, squareness, and scratch-free stacking |
|
Embossing |
Presses a raised pattern into the strip surface |
Garage doors, wall panels, appliance fronts, decorative parts |
Pattern depth, gloss consistency, and paint cracking |
Many Orders Need More Than One Step
Real orders rarely use just one service. A garage door maker might need embossed coil slit to an exact width before roll forming. An appliance plant might need embossed coil cut into flat blanks.
The sequence matters, because every extra pass adds another contact point with the finished surface. Treat the table as a starting point. The right route depends on your part, your line, and how much handling your coating can take.
Slitting: Exact Widths Without Edge or Surface Damage
Slitting looks like the easiest job in the shop. A wide coil goes in, and narrow coils come out. Yet more coated coil complaints reach my desk from slitting than from any other step.
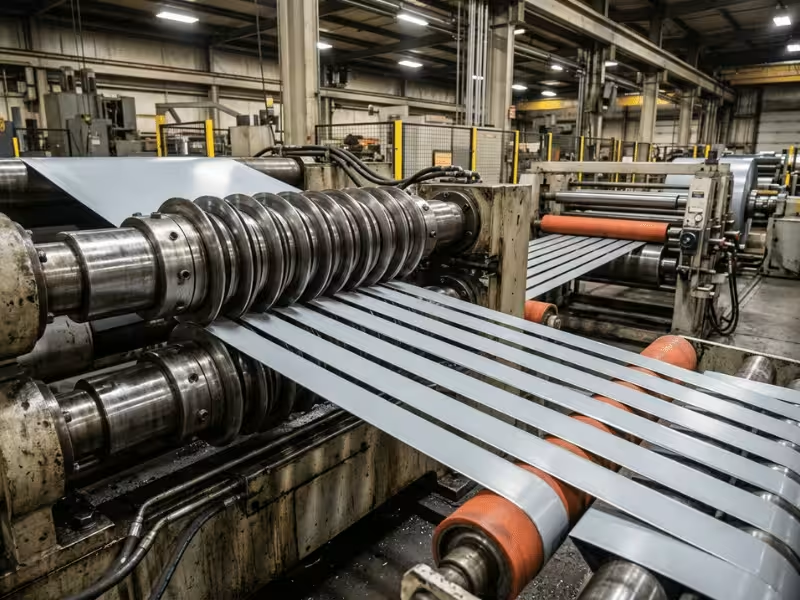
How a Slitting Line Works
A slitting line has four main parts:
- Uncoiler. Holds the master coil and feeds the strip forward.
- Rotary slitter knives. Sit on two arbors at the exact widths you ordered. Each knife pair makes one continuous cut.
- Tension stand or bridle. Keeps every strand tight and even. Without it, strips wander and wind loosely.
- Recoiler. Winds each strand into its own slit coil.
One master coil can become two, ten, or even thirty narrower coils in a single pass.
When Slitting Is the Right Call
I recommend slitting when your next machine needs coil, not sheets. Four situations come up most often:
- Your roll former needs a fixed width. A garage door line set for 600 mm won’t run 620 mm strip without trim waste or jams.
- You want several widths from one coil. Slitting one master coil into mixed widths often costs less than buying each width separately. It also eases minimum order pressure from the mill.
- You need narrow widths but not the inventory. Pre-slit stock ties up cash and floor space. Slitting on demand lets you hold master coils and cut only what each order needs.
- Your tooling demands tight width control. Precision dies and tube mills punish width drift. A good slitter holds tighter tolerances than a mill edge.
Six Factors That Separate a Good Slit From a Bad One
When I audit a slitting line, I check these first:
- Width tolerance. Many coated coil jobs run at ±0.1 to ±0.2 mm, depending on thickness and width. Get the number in writing, because “close enough” means different things at different shops.
- Camber. This is the sideways bow along a strip. Even 2–3 mm over 2 meters can push a strip off track in a roll former. Uneven tension or stress inside the master coil usually causes it.
- Burr. This is the small ridge the knife leaves on the edge. Excess burr cuts hands, scratches stacked parts, and stops panels from fitting flush. Buyers often cap it at around 10% of thickness.
- Knife clearance. Clearance controls burr and edge quality. Wrong settings tear the metal instead of cutting it, and tearing cracks the paint near the edge.
- Tension control. Steady tension keeps strands straight and tightly wound. Unstable tension creates camber, loose wraps, and scuffing.
- Coating-safe contact surfaces. Every roll, separator disc, and pad touches your finished face. I look for polyurethane-covered rolls, felt pads, and clean separators, not bare steel.
Common Slitting Risks on Coated Coil
- Scratches. Strands rub against each other and against separators. Without protective film or soft tooling, you get long scratch lines that only appear once panels sit side by side.
- Edge damage. Dull knives or poor clearance crush the edge and lift paint. On galvanized or prepainted coil, that cracked edge becomes the first place rust starts.
- Coating pickup. Paint flakes and zinc fines build up on rolls and knives, then mark and dent the next coil. Ask how often the processor cleans tooling between coated jobs.
- Telescoping. Poor recoil tension lets wraps slide sideways. The edges rub and mark, and the coils become hard to load and unsafe to handle.
Cut-to-Length: Flat Sheets That Stay Flat Downstream
Slitting keeps material in coil form. Cut-to-length does the opposite: it turns coil into flat sheets or blanks that go straight to your press, brake, or panel line. The cut itself is the easy part. The real value lies in how flat and clean each sheet arrives.
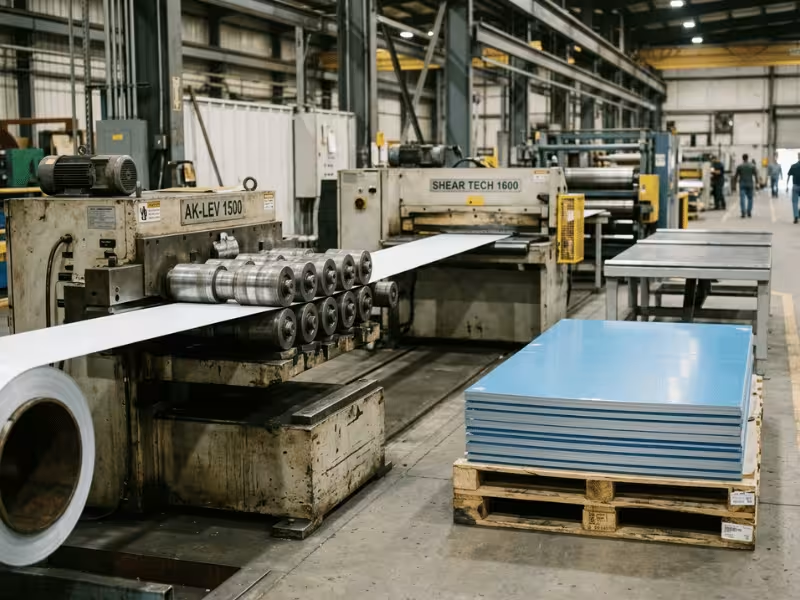
What a CTL Line Actually Does
A CTL line runs five steps in one continuous flow:
- Decoiling. The uncoiler pays out the coil at a steady, controlled speed.
- Levelling. Small work rolls bend the strip up and down to remove the curve it picked up during winding.
- Measuring. An encoder wheel or servo feed tracks exactly how much strip passes the shear.
- Shearing. A stop-start or flying shear cuts each sheet to length.
- Stacking. The stacker lays sheets onto a pallet. On coated material, I look for air cushions or soft belts so sheets don’t slide across each other.
Each step affects the finished sheet. Levelling usually decides whether that sheet works.
When CTL Is the Better Choice
I point buyers toward CTL when the next operation takes sheets, not coil:
- Sheet-fed manufacturing. Laser cutters, turret punches, and press brakes load one sheet at a time. Many fabricators have no uncoiler at all.
- Stamping blanks. Pre-cut blanks let a press run without a coil feed line and reduce setup time on short runs.
- Architectural panels. Cladding and soffit panels must lie flat on a façade. A 3-meter panel shows every wave under low afternoon sun.
- Appliance panels. Refrigerator sides and washer tops need precise, flat blanks before forming and assembly.
The simplest test: if your part has to sit dead flat, a coil can’t deliver that on its own.
Why Levelling Matters More Than Buyers Expect
Every coil remembers its winding. Good levelling erases that memory. Poor levelling only hides it.
Three flatness defects cause most of the trouble:
- Coil set. A lengthwise curve left by winding. It gets worse near the core, where the wraps sit tightest.
- Crossbow. A curve across the sheet width. It often appears when the leveller removes coil set but leaves stress in the strip.
- Waviness. Edge wave and center buckle come from uneven strip length across the width. Severe shape may need more work rolls, tighter roll spacing, or tension levelling.
Here’s the catch. A sheet can look flat on the stack because the sheets above press it down. The stress stays locked inside, and it comes out later:
- In bending, springback varies from sheet to sheet, and angles drift.
- In laser cutting or stamping, the cut releases stress, and parts twist or lift off the table.
- In assembly, panels won’t sit flush, and façades show oil canning.
On coated coil, also check the work rolls. Dirty or worn rolls press marks into the paint on every sheet.
What to Confirm Before You Approve a CTL Order
- Length tolerance. Ask for an exact figure, such as ±0.5 mm on short sheets. Long sheets usually need a wider range.
- Squareness. Ask for a maximum diagonal difference. Out-of-square sheets cause gaps at panel joints.
- Flatness standard. Name a standard, such as EN 10131 or ASTM A568, or set a custom limit like 3 mm per meter. Agree on how the processor will measure it.
- Sheet protection. Confirm the film type, which side it covers, and whether it will survive your forming process.
- Stacking method. Define the pallet size, maximum stack weight, and edge alignment.
- Interleaving. For high-gloss or embossed sheets, request paper or foam between sheets to stop rub marks in transit.
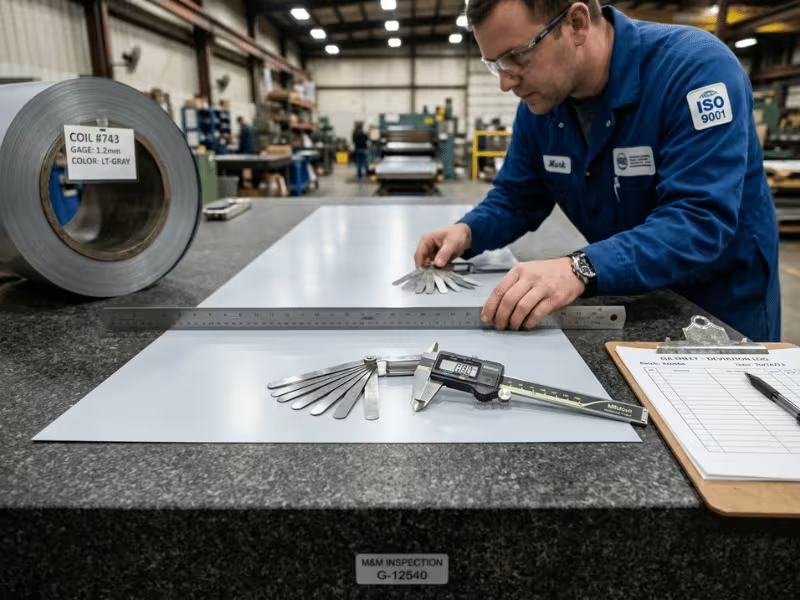
Check a few first-article sheets on a flat table. That small step tells you more than any quote sheet.
Embossing: Adding Texture Without Cracking the Coating
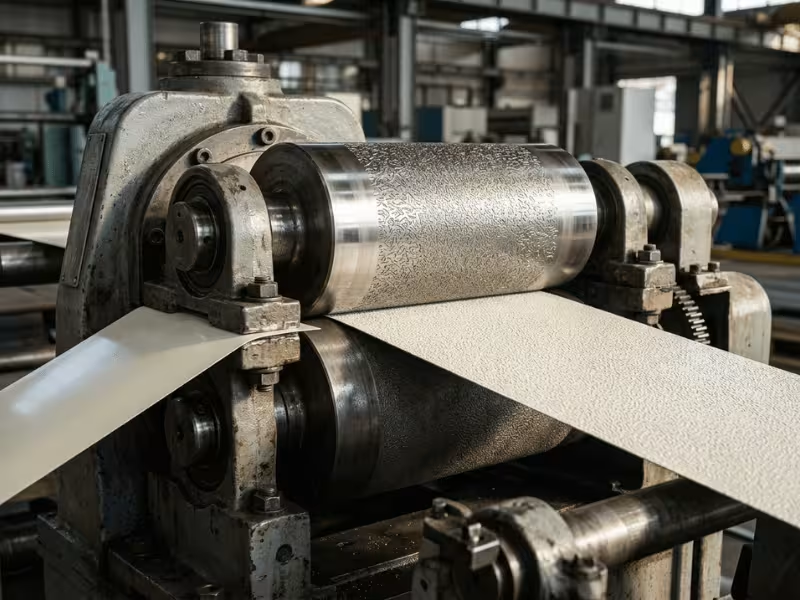
Embossing gives a flat coil a new face. Hardened rolls press a pattern into the strip, such as stucco, woodgrain, leather, or fine linen. When it goes right, a plain panel starts to look and feel like a finished product.
It also puts more stress on the coating than slitting or CTL. The pattern stretches the paint at every peak and valley.
What Embossing Delivers Beyond Looks
- Texture and premium feel. A woodgrain garage door or leather-look appliance panel feels more expensive than flat steel at almost the same material cost.
- Stiffness. The pattern works like tiny ribs. It adds rigidity, reduces oil canning, and sometimes allows a slightly thinner gauge.
- Glare reduction. Texture scatters light, so large façade and ceiling panels look calmer under bright light.
- Damage hiding. Texture masks small dents, handling marks, and fingerprints far better than a smooth, glossy face.
- Differentiation. Texture helps a product stand apart on a crowded showroom floor.
Where Embossed Coated Coil Earns Its Place
- Garage doors. Woodgrain and stucco stiffen wide, thin panels and give steel a warmer look.
- Appliance panels. Refrigerator sides, washer cabinets, and range hoods use fine textures that resist fingerprints.
- Wall panels. Cold room panels, sandwich panels, and cladding use stucco or light ribbing to cut glare and hide waviness.
- Shelving. Retail and warehouse shelving uses texture to mask scuffs from daily loading.
- Decorative interiors and signage. Elevator cabs, ceilings, and sign backgrounds use leather, linen, or custom patterns to reduce reflection.
Emboss Before or After Coating?
This question shapes the whole order, yet many buyers never ask it.
Embossing before coating means the mill embosses the bare or metallic-coated substrate, then runs it through the paint line. The paint flows into the texture and cures on the final shape, so it doesn’t have to stretch. This route suits deep or sharp patterns and some laminated finishes. The trade-off is flexibility: you need volume at the paint line, and you can’t easily change patterns later.
Embossing after coating is common for garage doors and stucco panels. You can hold standard prepainted coil and emboss to order. It works well for short runs, quick pattern changes, and lower inventory.
Two factors decide whether post-coating embossing will hold up:
- Coating system. Flexible polyesters and many PVDF systems tolerate forming well. Harder or thicker coatings may crack or lose adhesion at the peaks.
- Pattern depth. Deeper patterns stretch the paint more. I always check the paint’s T-bend rating against the planned depth before I commit.
What to Lock Down Before You Order
Embossing problems are hard to fix once the coil leaves the line. Confirm these points first:
- Pattern. Name the exact roll or pattern code. “Stucco” can mean a dozen different textures.
- Depth consistency. Agree on a target depth and tolerance across the width. Shallow edges and a deep center look patchy once panels sit side by side.
- Gloss. Embossing lowers apparent gloss. If you need to match flat parts, approve gloss on embossed material, not on a flat paint panel.
- Paint flexibility. Ask for T-bend and impact results for the actual coating, then check the peaks under magnification for microcracks.
- Sample approval. Sign off on a physical sample from the production roll, not a photo or catalog swatch.
- Repeatability. Ask how the processor tracks roll wear and records settings. Your reorder in six months should match the panels already in the field.
Keep one approved sample on file as your reference. It settles disputes faster than any written description.
How to Choose the Right Processing Route in Three Steps
A wrong route rarely shows up on the quote. It shows up weeks later, when strips jam a roll former or a pallet of panels fails inspection. By then the coil is cut, and you can’t undo it. When buyers ask me which service they need, I walk them through three questions.
Step 1: Start With the Next Machine
Set the coil aside and look at what your next operation loads:
- A roll former, tube mill, or coil-fed press needs coil at a fixed width.
- A laser cutter, press brake, or turret punch needs flat sheets.
- A product that sells on looks, like a garage door or appliance front, needs a textured surface before forming.
Ask your production team, not only purchasing. They know what the line actually accepts.
Step 2: Identify the Feature That Can’t Drift
Every part has one feature that decides pass or fail. If a 0.2 mm width shift stops the part from forming, width tolerance comes first. If panels fail because they won’t sit flush, flatness matters most. If customers reject parts for gloss shifts or patchy texture, surface appearance leads.
Write that priority on the purchase order. Processors set up their lines differently when they know what matters most.
Step 3: Protect the Step You Can’t Reverse
Some mistakes cost a little. Others cost the whole batch.
A wrong slit width can sometimes be re-slit, but you lose edge trim and add another pass over the coating. Warped sheets can go through a leveller again, yet locked-in stress often returns during bending. Rejected embossed panels rarely get a second life, because nobody can remove a pattern.
Quick Route Finder
|
If Your Next Line Needs… |
Choose |
|---|---|
|
Narrower coil at a fixed width |
Slitting |
|
Flat sheets or blanks |
Cut-to-length |
|
Texture or visual differentiation |
Embossing |
|
Textured strip for roll forming or blanks |
Embossing + slitting or CTL |
For combined routes, ask which step runs first and how many times the coated face gets touched along the way.
Matching the Process to Your Substrate and Coating
The same slitter or leveller can produce perfect results on one coil and rejects on the next. Most of the time, the cause comes down to what’s under the paint, and what’s on top of it.
Steel vs. Aluminum
Aluminum is softer and springier than steel. It dents easily, scratches faster, and leaves fine metal pickup on knives and rolls. I set lower line tension, tighter knife clearance, and cleaner contact surfaces for aluminum jobs.
Aluminum also springs back more after levelling, so a sheet that looks flat at the shear can relax into a slight curve on the pallet. Ask whether the processor has run your specific alloy and temper, not just “aluminum.”
High-strength steel brings the opposite problem. It resists levelling, so a light-duty leveller may leave coil set behind.
Galvanized and Zinc-Aluminum Coil
Every slit or shear cut exposes bare steel at the edge. Pure zinc protects that edge fairly well. Zinc-aluminum coatings, such as Galvalume, give less protection at a fresh cut, and edges can stain sooner in humid storage. To reduce the risk:
- Store slit coils dry and off the floor.
- Request VCI paper or sealed packaging for long transit.
- Keep burr low, because torn edges hold moisture.
Zinc also flakes onto rolls. A processor who cleans tooling between galvanized and prepainted jobs saves you from dents and marks.
Paint Systems
Polyesters and most PVDF systems handle moderate embossing well, though PVDF scratches more easily during handling. Plastisol is thick and highly flexible, so it suits deep textures. Harder coatings can crack at the peaks, which is why the T-bend check matters before any embossed order.
Laminated and Film-Coated Coil
PVC laminates and protective films add a soft layer that moves under pressure. During slitting, film can lift or fray at the edge. During embossing, it can stretch, wrinkle, or trap air bubbles.
Protective film also has a shelf life. Heat and sunlight make the adhesive bond harder over time, and old film can leave residue when you peel it. Confirm the film type, which side it covers, and how long you can store the material before removal. Tell the processor about any film or laminate up front, because it changes their tooling, speed, and handling plan.
The Spec Sheet to Send Before Processing
Most processing problems I trace back start with the purchase order, not the line. A vague spec forces the processor to guess, and a guess that works for one buyer can ruin a run for another.
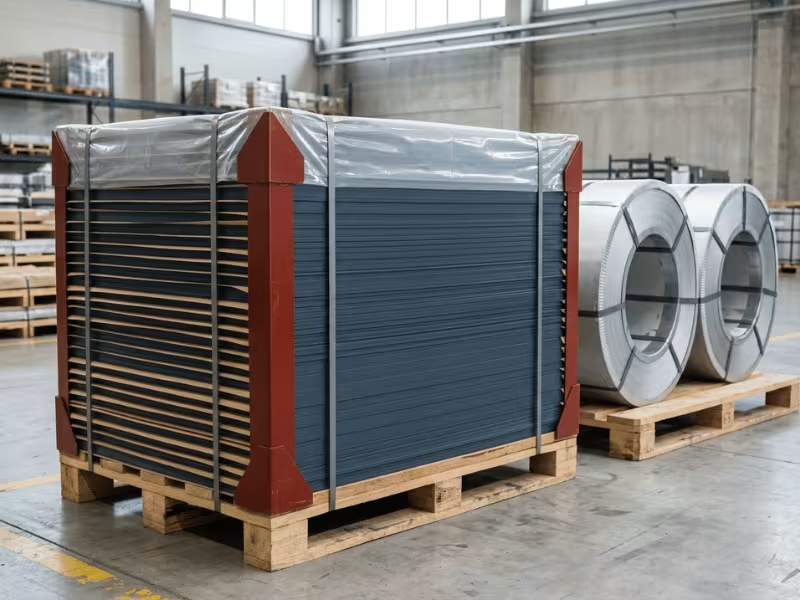
A complete spec sheet takes about ten minutes to fill out. It saves weeks of back-and-forth and puts every quote on the same baseline.
|
Item to Specify |
Why It Matters |
|---|---|
|
Substrate / alloy and temper |
Changes knife clearance, line tension, and levelling settings. “Aluminum” alone isn’t enough. |
|
Coating system |
Polyester, PVDF, plastisol, and galvanized each handle contact and forming differently. Decides tooling and embossing limits. |
|
Thickness and tolerance |
Sets knife clearance and leveller setup. Include the tolerance, not just the nominal gauge. |
|
Master coil width |
Shows how many cuts fit and how much edge trim you’ll pay for. |
|
Target slit widths / sheet lengths |
Defines the finished part. List every width or length with quantities. |
|
Tolerances |
Width, length, camber, burr, squareness, and flatness. Written numbers make “good” mean the same thing to both sides. |
|
Coil ID / OD / weight |
Your uncoiler has limits. A coil that’s too heavy or has the wrong core size won’t load. |
|
Protective film and interleaving |
Film type, which side it covers, and whether sheets need paper or foam between them. |
|
Edge condition |
Mill or slit edge, burr direction, and edge protection for galvanized or zinc-aluminum coil. |
|
Packaging and labeling |
Pallet size, eye-to-sky or eye-to-wall, VCI wrap, and label data for traceability. |
|
First-article sample |
Lets you check width, flatness, and surface before the full run. Catching a problem on one coil beats finding it on forty. |
Two Details Buyers Miss Most Often
- The show face. Processors treat top and bottom surfaces differently. A flipped coil puts scratches right where your customer looks.
- The next operation. Tell the processor whether the material feeds a roll former, a press brake, or an appliance line. That one note changes how they set tension, pick tooling, and pack the order.
With a complete spec sheet, a processor can quote accurately, plan the run once, and ship material that works the day it arrives.
Hidden Defects That Surface on Your Line, Not Theirs
The hardest defects often pass inspection at the processor. The coils look clean and the sheets stack neatly. Then, two weeks later, your forming line stops or a customer emails photos of rejected panels. Five problems come up again and again:
- Burr that blocks fit. A slit edge can feel fine on a coil. Once installers slide panels together, a tall burr stops them from seating flush, slices through gloves, and scratches the panel below.
- Camber that pulls strip off track. A strip with 3 mm of sideways bow looks straight on the recoiler. In a roll former, it drifts into the guides, scuffs the edge, and twists the profile.
- Coil set and crossbow that come back. Sheets lie flat under the stack’s weight. On the press brake, bend angles drift. On a façade, panels bow between fasteners.
- Scratches hidden under film. A dirty roll leaves a faint mark under the protective film. Your customer peels the film on site and finds the same line on every panel.
- Edge rust in storage. A warm, humid warehouse can stain the exposed edges of galvanized or zinc-aluminum coil before forming.
Questions That Catch Problems Before the Run
|
Problem |
Likely Cause |
What to Ask the Processor |
|---|---|---|
|
Burr |
Dull knives or wrong clearance |
What is your burr limit, and how often do you regrind knives? |
|
Camber |
Uneven tension or stress in the master coil |
What camber limit can you hold over 2 meters? |
|
Coil set / crossbow |
Light-duty or poorly set leveller |
Which flatness standard do you use, and how do you measure it? |
|
Coating scratches |
Dirty rolls, bare steel contact, poor stacking |
Do you use covered rolls, and when do you clean tooling between jobs? |
|
Edge rust |
Exposed cut edges, damp storage, open packaging |
Do you offer VCI wrap, sealed packaging, or edge protection? |
Get the answers in writing. Then run your first-article coil or sheets on your own line, not just across a measuring table. Your next machine catches problems a processor’s final check can miss.
Service Center, Toll Processor, or In-House Line?
Buyers often ask whether they should buy their own slitter or keep sending coil out. The answer depends less on the machine and more on who owns the material, how much you run, and who carries the risk.
|
Option |
How It Works |
Best Fit |
|---|---|---|
|
Service center |
Buys coil from mills, holds stock, processes it, and sells finished strip or sheet |
Buyers who want one price for one finished product |
|
Toll processor |
Processes coil you own for a fee, then ships it back |
Buyers who source their own coil but lack equipment |
|
In-house line |
You own the equipment, crew, and every result |
Steady, high-volume, repeat widths with tight lead-time control |
When Outsourcing Makes More Sense
A slitting or CTL line pays off only when it runs. A line built for coated material can cost several hundred thousand dollars, and a precision leveller adds more. Then come tooling, knife regrinds, trained operators, and floor space. If the line sits idle half the week, every ton carries that cost.
Setup time adds up too. Short, mixed-width runs can eat a full shift. Outsourcing usually wins when volume is uneven, widths change often, or you need embossing only now and then.
Settle Who Pays for the Scratch
Agree on liability before the first coil ships. A service center usually stands behind the processed product as delivered. A toll processor often covers only the damage it causes. Your mill or paint warranty may not follow the coil through someone else’s line, so check with your coating supplier first.
When you compare partners, look for:
- Proven work on your coating and substrate, backed by samples
- Covered rolls and recorded tooling cleaning between jobs
- Written tolerances and a clear claims process
- First-article approval before the full run
Trust the partner who tells you plainly what they won’t take on. That honesty shows you how they’ll handle a problem later.
Frequently Asked Questions
Conclusion: Start With the Next Machine
Good coated coil processing starts with the next machine, not the coil. Know what your roll former, press brake, or panel line needs to receive, and the right route usually follows.
When a job goes wrong, I rarely find bad material behind it. I find one of four gaps:
- Unclear specs
- Weak flatness control
- Poor surface protection
- Services run in the wrong order
Each one stays quiet on the processing line and gets loud on yours. You can close most of them before the first cut: put tolerances in writing, define film, interleaving, and packaging, and approve a first-article sample on your own line.
Plan Your Next Coated Coil Order
Not ready to order yet? Download our Coated Coil Processing Spec Checklist. It covers every item a processor needs to quote accurately, from substrate and coating system to show face, tolerances, and packaging. Use it on your next RFQ, and every quote you receive will start from the same baseline.
Have a project on the table? Submit your specs for a free processing route review. Send us:
- Material specs, including substrate, grade, and thickness
- Target widths, lengths, and tolerances
- Coating system and show-face side
- A sample or drawing of the finished part
Our team will review the details and recommend a processing route that fits your line from the first coil.
